20 Fun Facts About Replacing Window Seal
Tips For Replacing Window Seals Window seals are not simply a means to keep out the elements. The seal keeps the argon and krypton gases between the panes of double or triple-paned windows. Failing seals may cause fogged windows due to moisture in the air, and can increase energy bills. It is crucial to fix them. Sealant Window sealants (also known as window caulking or window silicon) play a key part in ensuring the quality of windows as well as improving energy efficiency. However, the proper application of window sealant is an art that requires practice to perfect. A sealant that is incorrectly applied can lead to air leaks, drafts and increased energy bills. The technique of applying window sealants will help homeowners avoid these issues and save money over time. There are many different types of window sealants and it is crucial to choose the best one for your project. For instance, certain kinds of sealants adhere better to particular materials while others are more compatible with various weather conditions. Furthermore, certain sealants take longer to set than others. Make sure to test new formulations so that you avoid wasting money and time. Whatever type of window sealant that you decide to use it is essential to prepare the surface before beginning the work. First, clean away any dust or dirt with a damp cloth. If the area you're working on is dirty or dusty, it won't stick to the caulk, and could affect the insulation of your window. You can also employ a utility knife to scrape away any excess material. Once the area is clean, apply a primer to make sure that the window sealant sticks correctly. After the primer has dried then it's time to apply the actual sealant. Before you begin, make sure to read the manufacturer's instructions for application. You can purchase a caulking gun to simplify the process and there are online tutorials that can walk you through the fundamentals. Once you are comfortable using the tool, you can begin applying the sealant in a line from one end to the other. Once you're finished press the pressure release catch on the caulking tool in order to prevent any more liquid from leaking. Depending on the thickness of your beads, it could take anywhere from 12 to 15 hours for the window caulk to dry. After this time you can sand off the sealant gently using an sanding block to smooth the line and give it a nice finish. Removal Few components of a structure deliver more value per dollar spent than window seals. These thin strips keep the outside weather out and keep structures and contents secure and help to improve energy efficiency. They should be treated with care and respect. It is essential to check and repair them as necessary to ensure optimal results. If the window seal is damaged it could lead to many issues. Moisture can cause fogging on the windows, which can reduce visibility and impacting the comfort of indoors. Physical impacts that are too strong along the frames from kids pets, pets, or cleaning tools can cause deterioration and dislodge window seals before their time. Draughts can also get through a damaged seal, increasing heating costs. It is not difficult to change the window seal, however it may require some invasive work to gain access to the frame. Start by assessing window seal repairs near me of the seal. After this, the new seal can be placed in the correct location with a simple push. The type of window you are working with will determine the tool you will use. For instance the flathead screwdriver can suffice for most tasks but if the seal has been fixed with glue it is the right tool needed to break it loose. 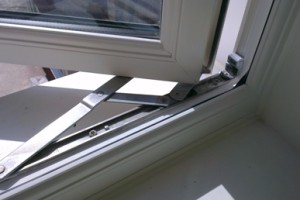 Once the old seal has been removed cleanse the area thoroughly with water and a mild detergent. This will help to get rid of any residue that remains and allow the new seal to adhere to the frame. The filler strip is then installed. The strip of filler can be made of caulk-like or rubber substance. Some manufacturers offer a hybrid with the wedge of bubbles for insulation and resistance to draughts. It is important to follow the directions of the manufacturer for maintenance, regardless of material. This will help to maintain the highest performance. It is important to keep window seals dry and clean and to clean them frequently with mild soap and warm water. Preparation One of the most important steps in a window seal replacement is thoroughly cleaning the surface that will receive the new caulk or sealant. This step is often forgotten, but it is crucial to ensuring that the sealant is adhered properly and stays permanently on the surface. This can be accomplished by soaking a cloth in a solution of water and mild detergent. It is important to cleanse all areas of the frame and window that might have residues or grease. They can hinder adhesion. Lastly, it is an excellent idea to make sure that the windows are fitted and functioning properly. If the frames are warped, for example it can cause pressure on the glass, and cause gaps through which air can be able to pass through, which can reduce the insulation properties. After the window frames and glass panes have been cleaned, it is time to prepare them for a new sealant. This is accomplished by scrubbing the surfaces with a sponge or damp cloth. A small amount of alcohol-based solution can be applied to the sealant to dissolve any adhesive left and make it easier for you to clean off. Before applying the new sealant it is a good idea to read the care instructions that come with it. They are usually very easy to follow, and they can be an excellent way to help extend the lifespan of a seal. Consider replacing your old windows with energy efficient ones if you want to improve the appearance of your home and save money on energy. They can be designed to incorporate a range of advanced technologies which will improve insulation and energy performance. They may also include features such as a low-E coating on the glass, which can help reflect harmful sunlight. Contact a reputable contractor to learn more about the benefits new windows can bring to your home. They will guide you through the process of selecting the best model, putting it in place and then adding weatherstripping or caulking. Installation Window seals are an important component of every window. They help to ensure the efficiency of your energy and also stop moisture intrusion. They're not guaranteed to last forever and you should be looking for signs of wear or damage. Fogging on windows is one of the most common symptoms of a broken seal. The fog is caused by the water leaking between the glass panes. It isn't easy to get rid of. It's important to contact an experienced window company and have your windows sealed in the earliest time possible to avoid any damage. It's possible to extend the lifespan of your window seals if adhere to a few basic maintenance tips. Read the manufacturer's instructions for your specific window seal. They are usually located on the frame of the window and might include information on the use of specific cleaners or certain cleaning methods. A second tip is to watch out for any cracks or gaps on the edges of your window. These cracks or gaps are an indication that the window seal has failed and needs to be fixed immediately. It's also an ideal idea to have your windows examined by a professional at least every two years. This will allow you to spot any issues before they start impacting the comfort of your home or causing structural damage. During an inspection, professionals will look for indications of wear or breakage. This could include grease from hands or tools on the backing of the seal, a gap between the frame and the glass or any other issue. The inspector can then suggest the correct course of action for repairs or replacement. A window seal that is damaged is a serious problem for your home. Not only will it reduce the efficiency of your energy however, it could cause water intrusion and other major problems. Window seals are a vital part of any window, and it is important to recognize the signs of damage so you can repair them as quickly as possible.